• Skip to primary navigation
  • Skip to main content
  • Skip to primary sidebar
  • Skip to footer

Cooking in my Genes

  • Home
  • About
  • Recipes
  • Gatherings
  • Free E-Cookbook
  • Contact
    • Privacy Policy
  • Shop

Lemon Blueberry Blondies

March 20, 2023 By Jess Leave a Comment

Jump to Recipe Print Recipe
lemon blueberry dessert bar

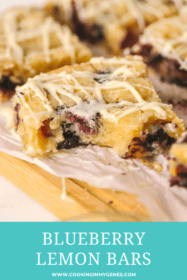
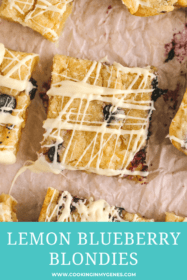
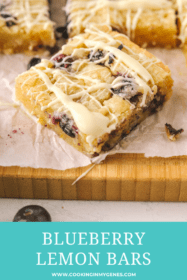
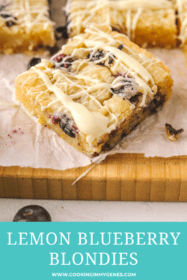
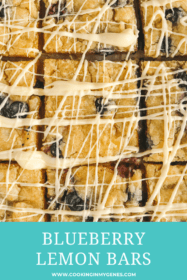
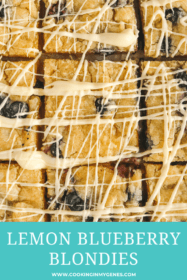
These lemon blueberry blondies are a fun and fruity spin on the classic blondie!

These soft and chewy blondies don’t need a mixer and are ready to go in the oven in just 10 minutes.

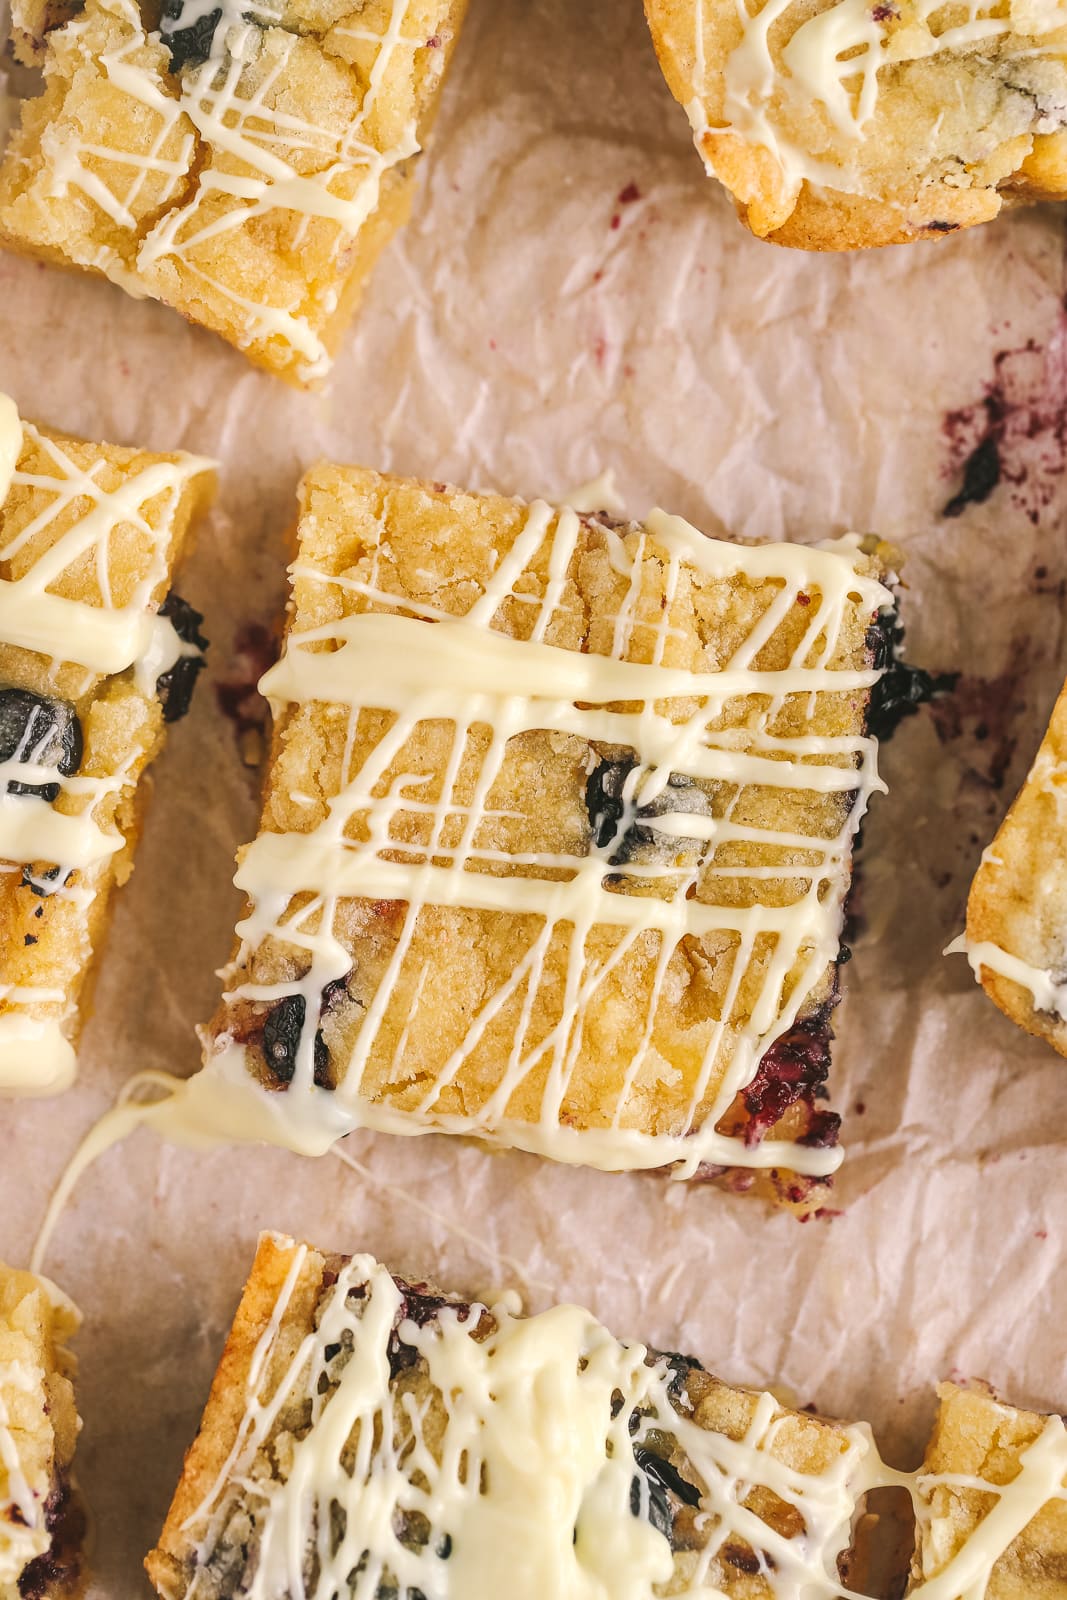
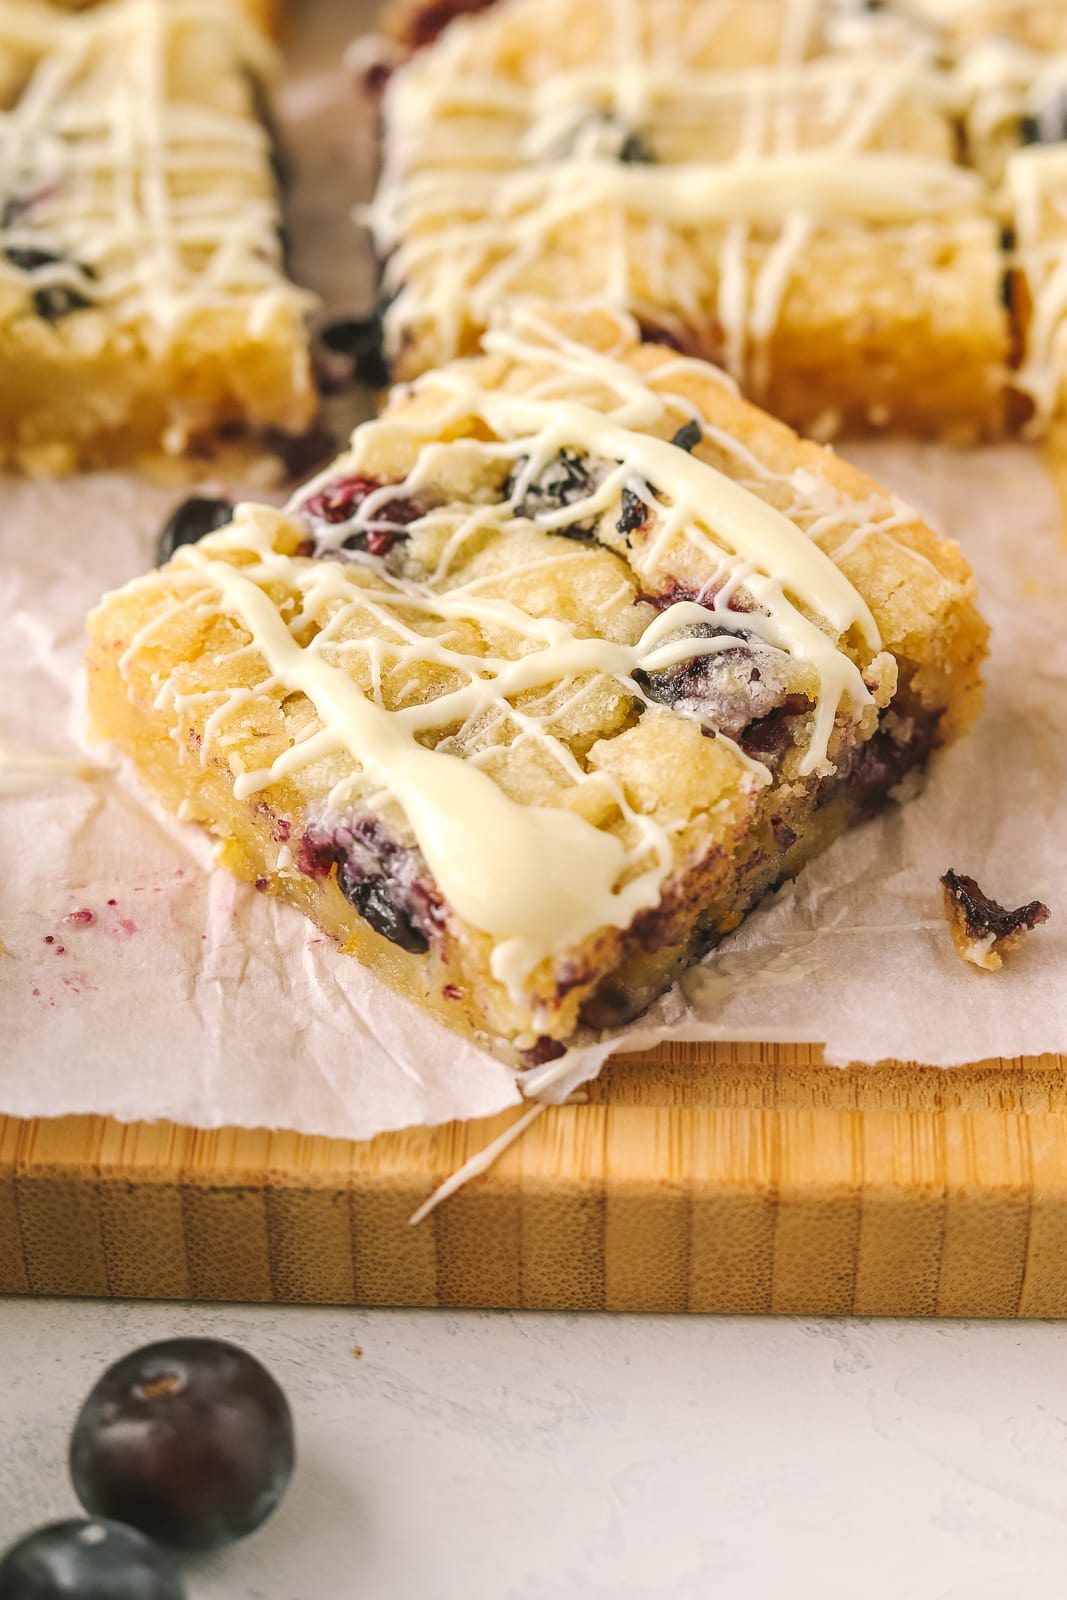
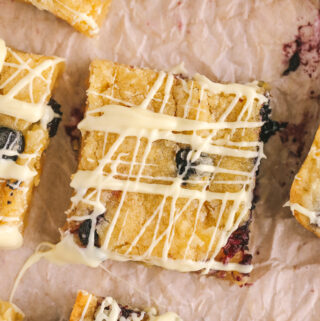
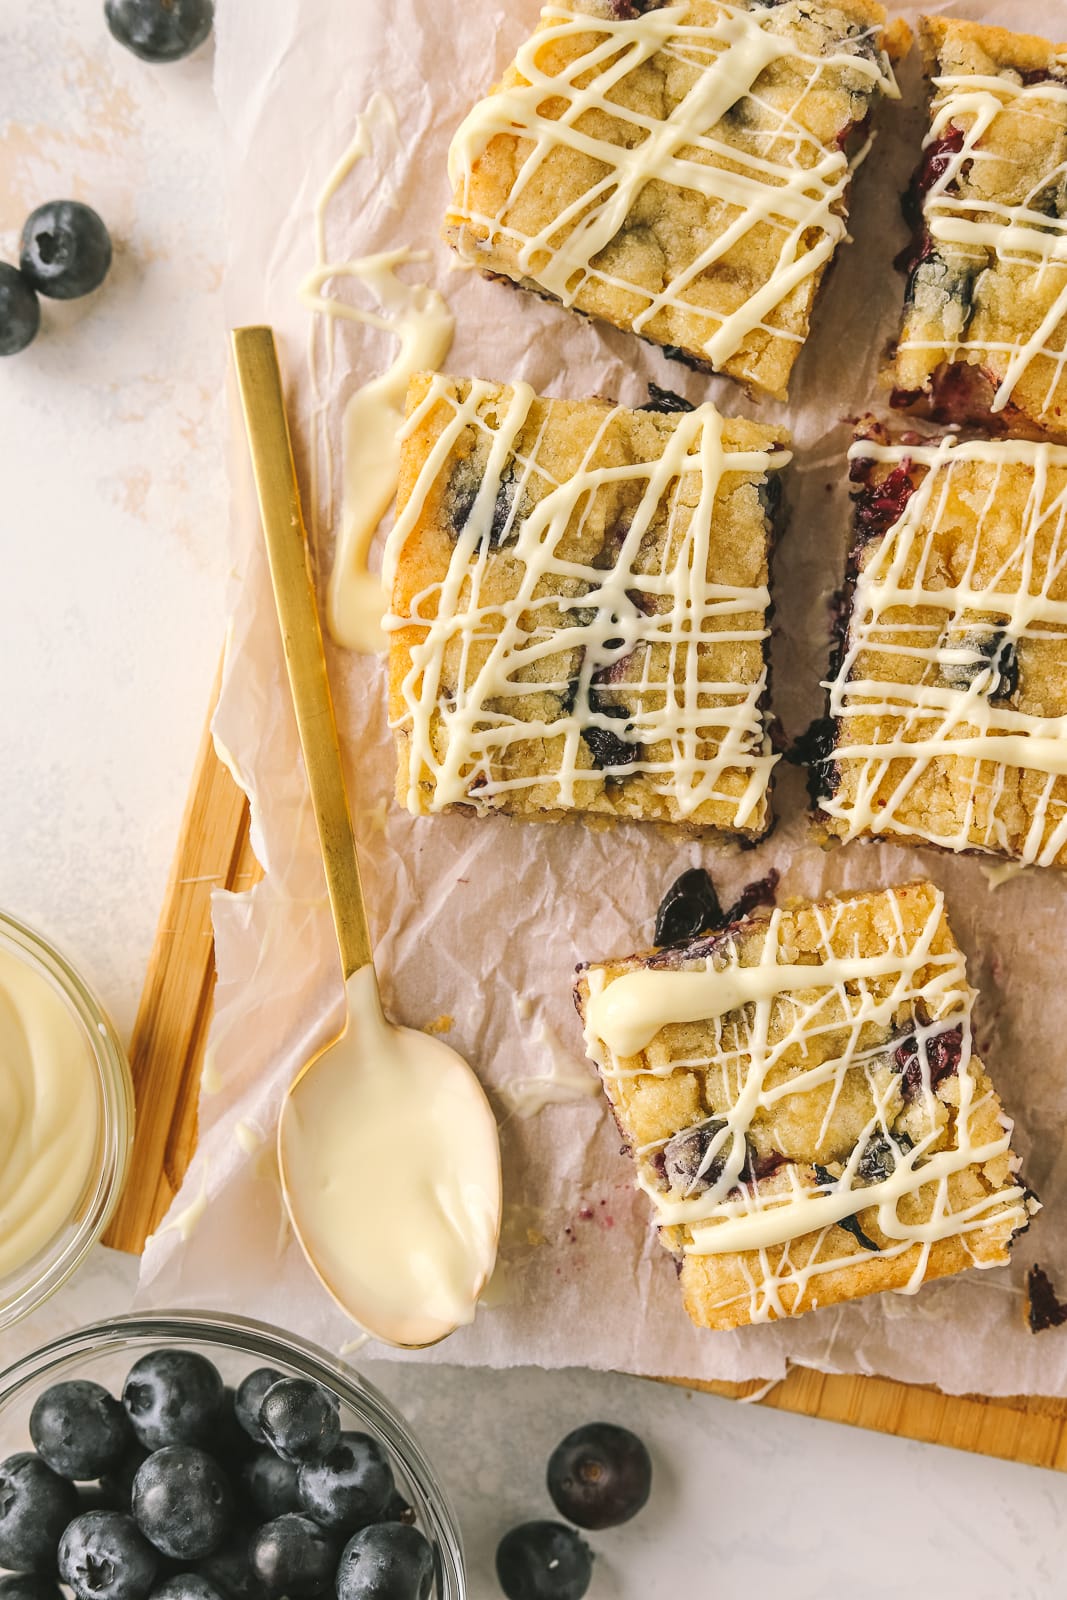
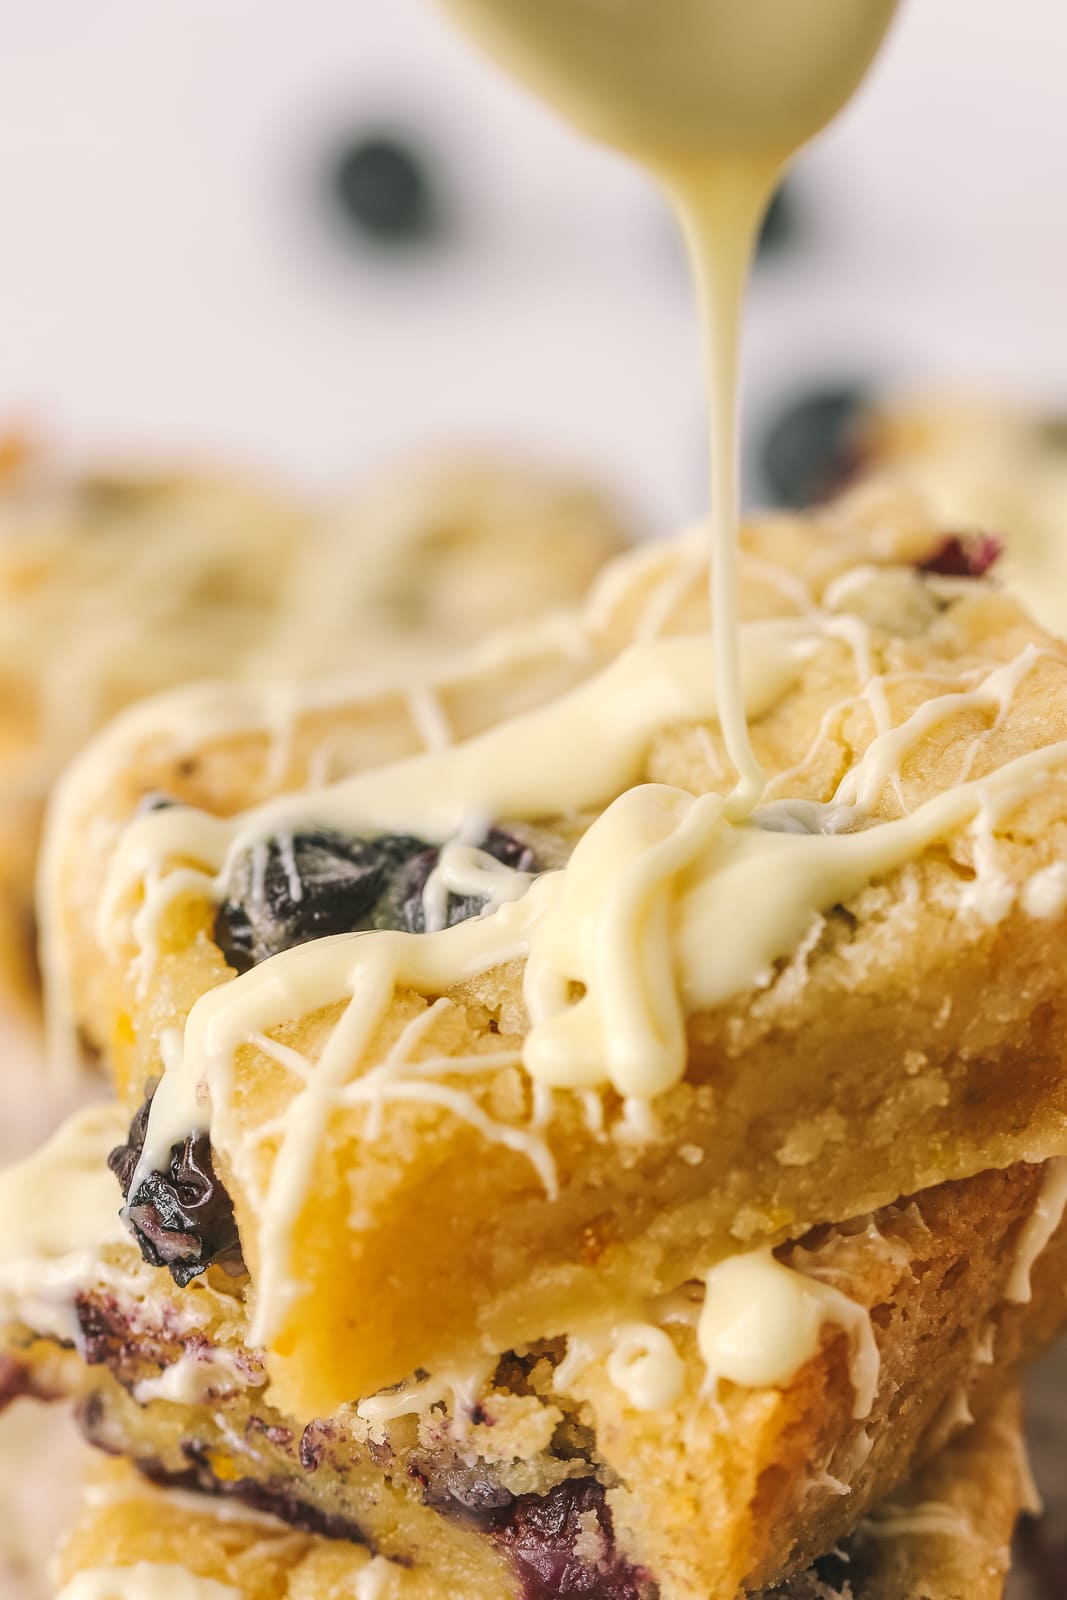
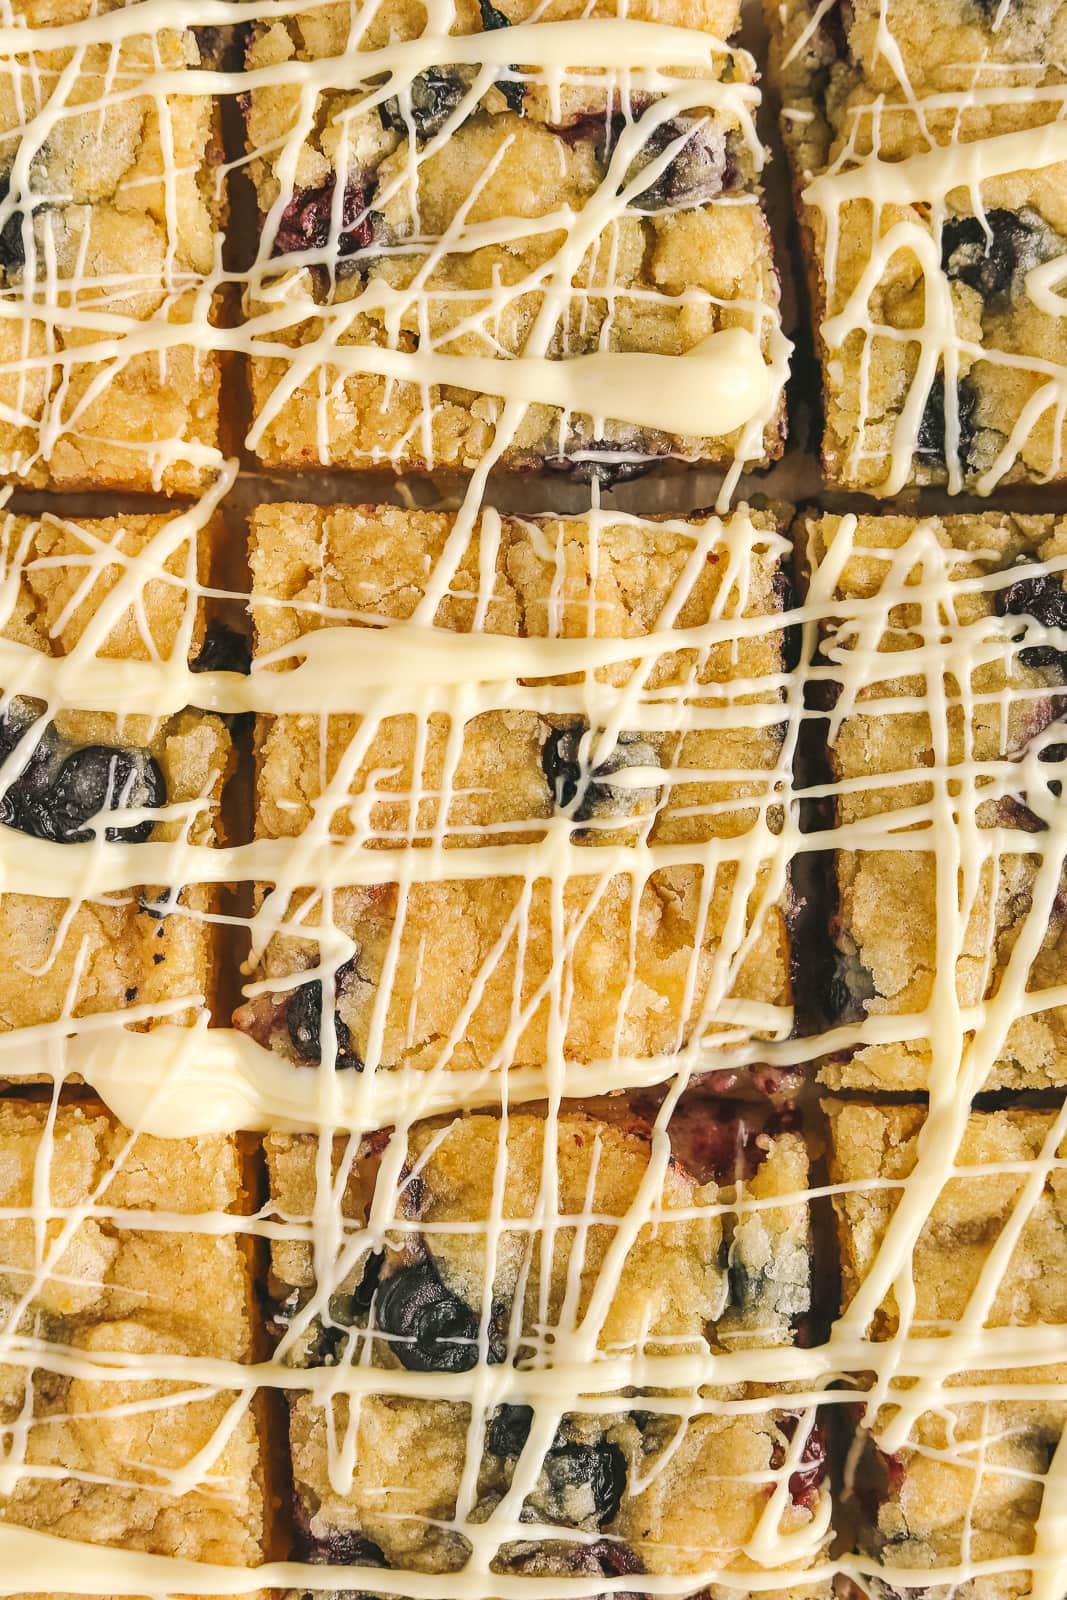
I’ve topped them with the best white chocolate drizzle too!

Come Spring & Summer, easy blueberry desserts are all I want to make! Whether it’s these blueberry lemon bars or my blueberry muffins, to me there is nothing that signifies warm weather more than baked goods packed with blueberry flavor! These lemon blueberry blondies are sure to be a family favorite for barbecues, get-together’s and picnics.

Why you’ll love these lemon blueberry blondies

  • Lemons and blueberries are a classic combination for a reason! The zesty lemon pairs perfectly with the sweet and tart blueberries.
  • This is the perfect blondie recipe for blueberry season.
  • You don’t need a stand mixer or hand held mixer to make these lemon blueberry blondies, just a mixing bowl.
  • I’ve topped these blueberry blondies with a white chocolate drizzle but that is totally optional.

Ingredients Needed to make this recipe

Blueberries: I recommend using fresh blueberries for this blondie recipe. Frozen blueberries release too much water when baking.

Lemons: we’ll be using the zest from a lemon to get maximum lemon flavor.

Flour: I’ve only tested this recipe with all purpose flour.

Butter: make sure the melted butter isn’t still too warm when you add it to the other wet ingredients!

Sugar: white and brown sugar make the best batter.

Egg: to keep the easy batter together.

Baking powder: important to make sure these blondies rise.

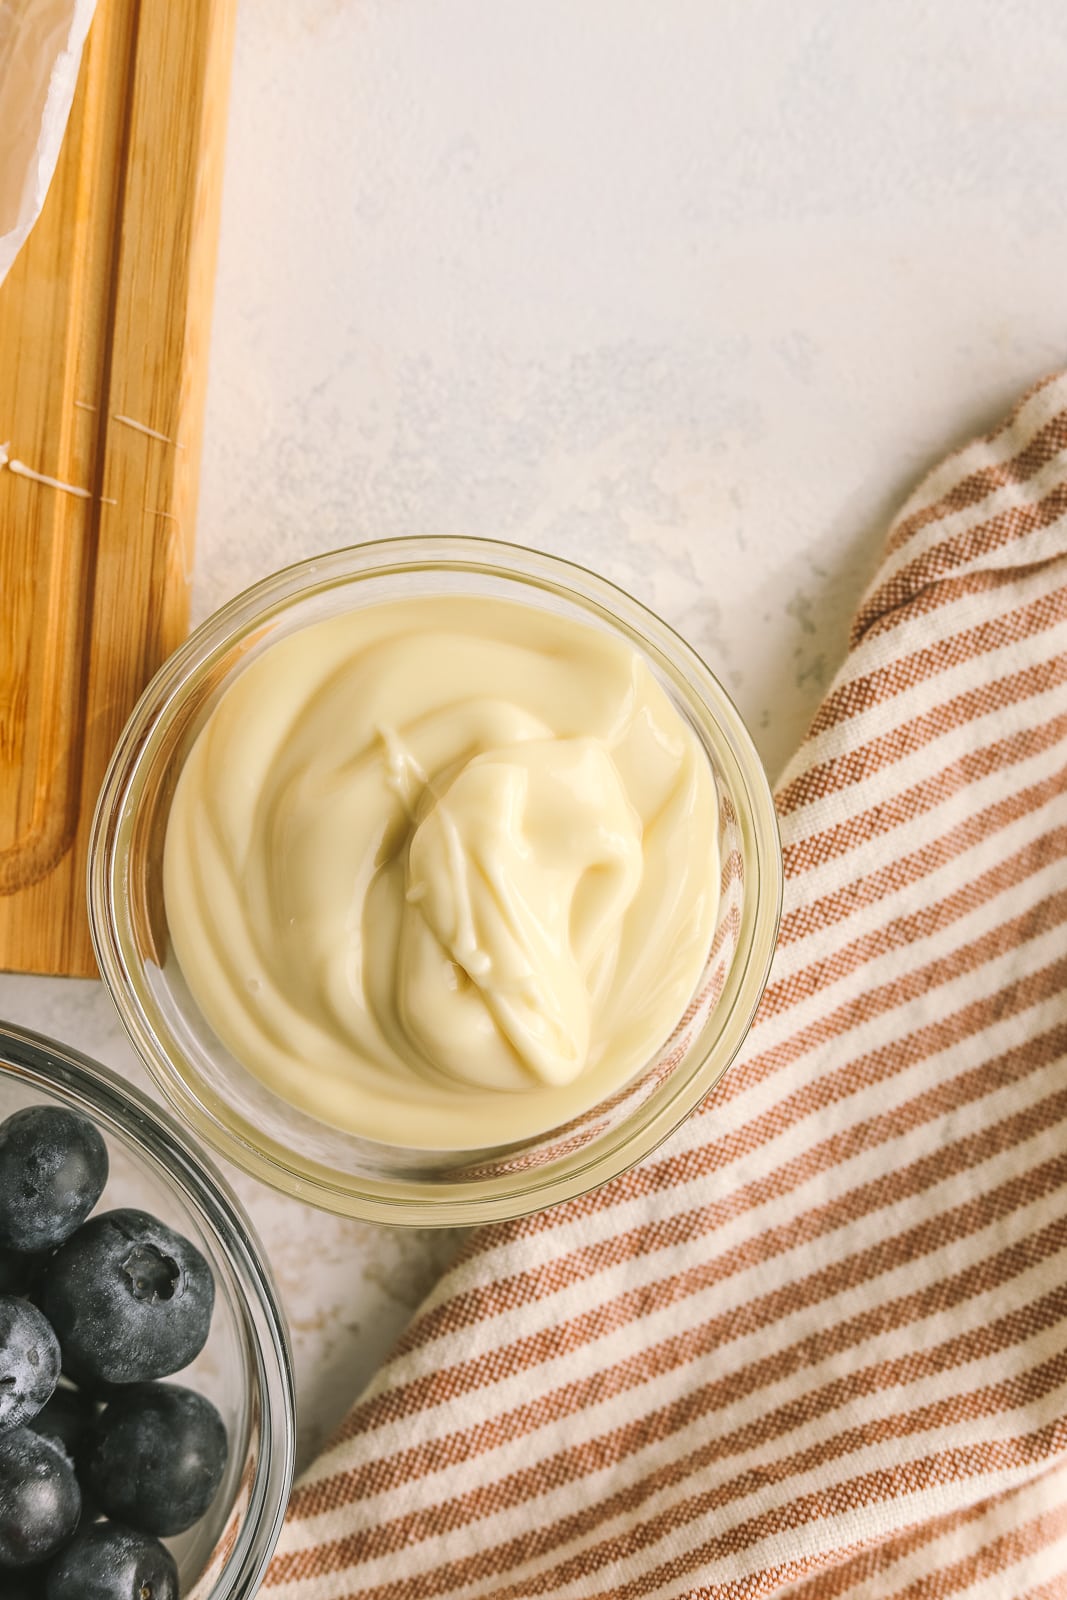
White chocolate chips: melted, they make the best drizzle to top this dessert!

Step by Step Process to make these lemon blueberry blondies

Step 1: Preheat your oven to 350°Fahrenheit and line an 8×8 baking pan with parchment paper.

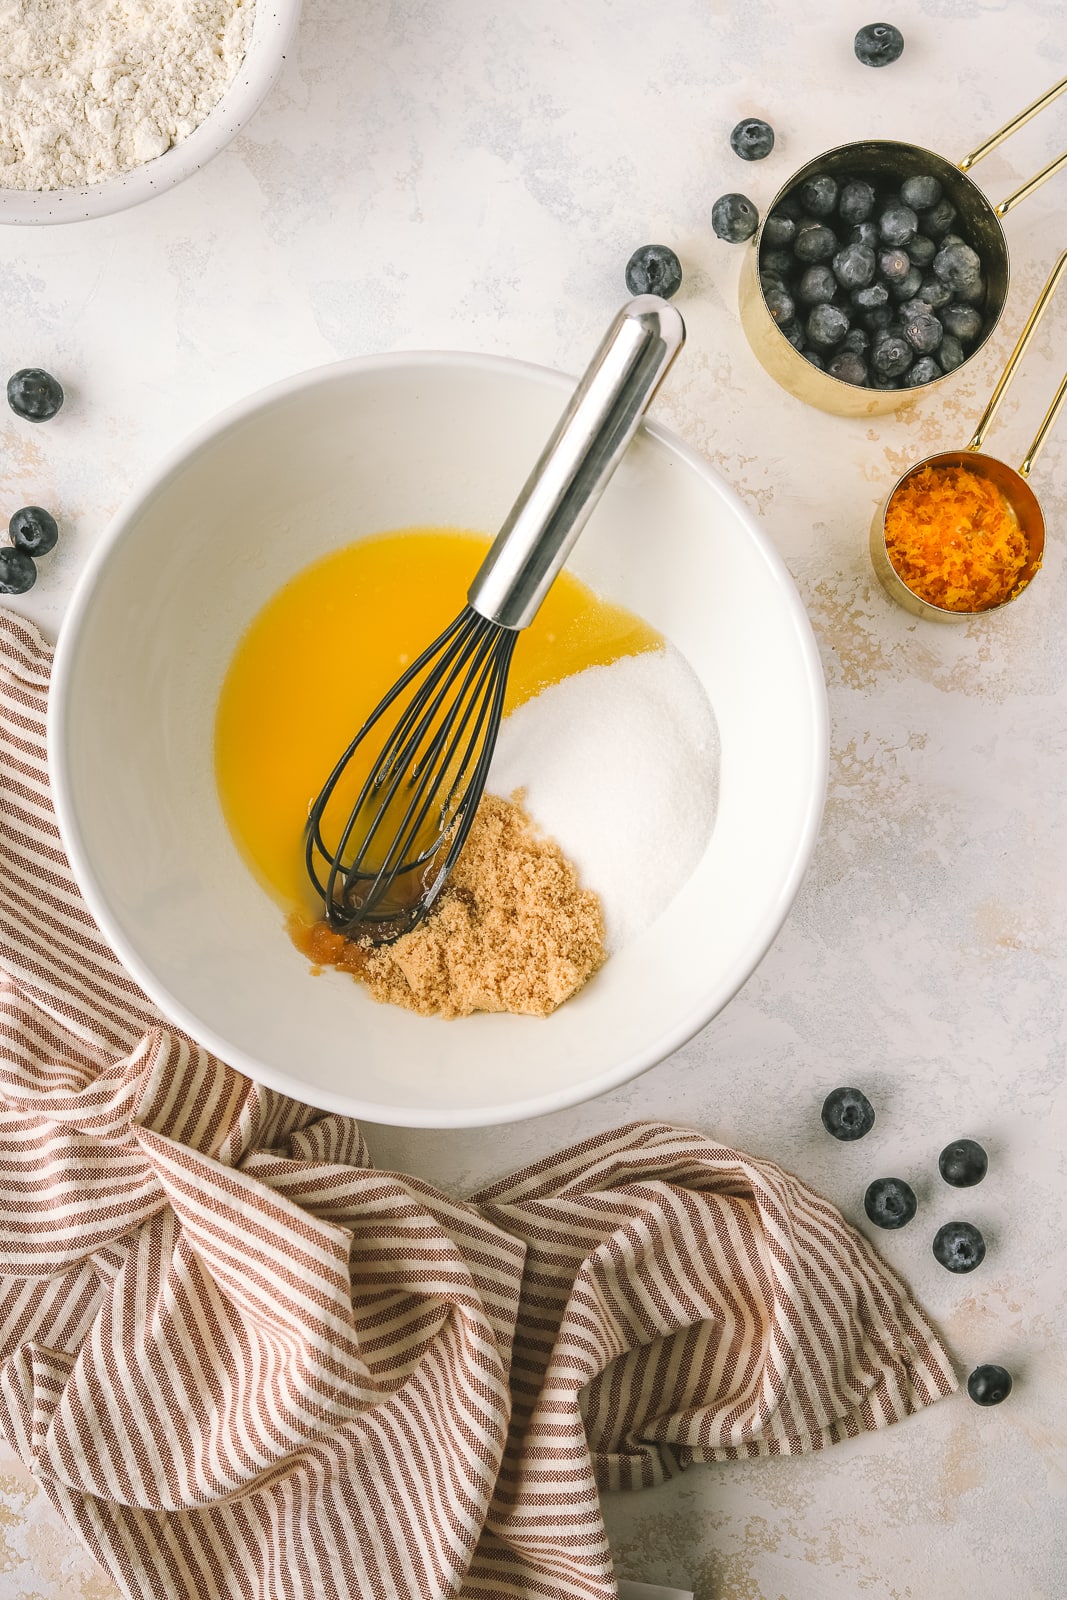
Step 2: In a large mixing bowl, whisk the melted butter, white and brown sugar together until well combined. Add the egg and vanilla extract and whisk once more. Finally, whisk in the lemon zest.

Step 3: Using a spoon or rubber spatula, fold in the flour, baking powder and salt into the wet ingredients. Stir until a batter forms and there are no more streaks of flour. The batter will be quite thick, almost like cookie dough. Stir in the fresh blueberries.

Step 4: Pour the blondie batter into your prepared pan and smooth the top so it is even.

Step 5: Bake the blueberry blondies for 25-28 minutes, or until a toothpick inserted comes out clean. Let cool completely, then cut into 9 or 12 squares.

lemon blueberry dessert bar drizzled with white chocolate

Lemon Blueberry Blondies

Course: Dessert
Cuisine: American
Keyword: blondies, blueberry
Prep Time: 10 minutes
Cook Time: 25 minutes
Total Time: 35 minutes
Servings: 9 -12 squares

These Lemon Blueberry Blondies are the perfect one-bowl dessert! Drizzled with white chocolate, they're delicious in the Spring & Summer.

Print

Ingredients

  • 1/2 cup unsalted butter, melted
  • 3/4 cup white sugar
  • 1/4 cup brown sugar
  • 1 egg
  • 1 tsp vanilla extract
  • zest from 1 lemon (about 2 tsp lemon zest)
  • 1 1/4 cup all purpose flour
  • 1 tsp baking powder
  • 1/4 tsp salt
  • 3/4 cup fresh blueberries
  • 1/2 cup white chocolate chips

Instructions

  1. Preheat oven to 350F and line an 8x8 pan with parchment paper. (If using a 9x9 pan see notes below on baking time).

  2. In a mixing bowl, whisk together melted butter, white and brown sugar until combined. Add the egg and vanilla extract and mix well. Whisk in the lemon zest.

  3. Using a spoon or spatula, mix flour, baking powder and salt into wet ingredients, stirring until everything comes together and no clumps of flour remain (it will be quite thick like cookie dough). Gently stir in the blueberries.

  4. Transfer the batter into the prepared pan and smooth out the top so the batter reaches the edges of the pan.

  5. Bake for 25-28 minutes or until a toothpick inserted in the center comes out clean. Let the blondies cool completely in the pan.

  6. Once cooled, drizzled with melted white chocolate chips and cut into 9 or 12 squares and enjoy!

Recipe Notes

  • Cooking times can always vary depending on your oven or if you use a larger square baking pan such as a 9x9. So, I suggest checking for doneness as they may take less or more time than indicated in the recipe.
  • Once the blondies are cooled and cut into squares, store in an airtight container on the counter for up to 3 days or up to 1 month in the freezer.
  • Should you use frozen blueberries? Frozen berries can release alot of water when cooking so definitely stick to fresh blueberries for this recipe.

FAQ

Can I use a different sized pan?
You can use a 9×9 pan, but the blondies will be thinner, so I recommend checking for doneness as they will take less time in the oven.

Can I use frozen blueberries?
Frozen blueberries release a lot more moisture when baking versus fresh blueberries, so I really recommend sticking to fresh blueberries for this recipe.

Expert Tips for making these blueberry lemon bars

  • I love drizzling over melted white chocolate icing, but these lemon blueberry blondies are delicious without it too!
  • You do not want dry and cakey blondies, so make sure to check on them in your oven so they don’t overbake! Ovens really vary and the temperature can fluctuate, so I recommend keeping an eye on them.
  • Make sure the parchment paper slightly overhangs the sides of the pan, that will make it so much easier to lift the cooled blondies out.

Storage

Once the blueberry lemon blondies are sliced, store in an airtight container for up to 3 days. To freeze, let the blondies cool completely then cut into squares. Store in an airtight container for up to 1 month. Let them thaw at room temperature before enjoying.

More delicious dessert bars to love from the blog:

Strawberry Crumble Bars

Snickerdoodle Blondies

Apple Pie Blondies

Until the next cooking adventure,
Jess

Print Friendly, PDF & Email

Filed Under: Dessert, Recipe Tagged With: blondies, blueberry, blueberry blondies, cookie bar, dessert bar, lemon, lemon blueberry blondies

Previous Post: « Carrot Cake Oatmeal Pancakes
Next Post: Easy Lemon & Herb Butter Roasted Turkey »

Reader Interactions

Leave a Reply Cancel reply

Your email address will not be published. Required fields are marked *

Recipe Rating


Primary Sidebar

About me

Welcome to Cooking in my Genes. I share my take on recipes I grew up with, foodie adventures & my kitchen creations. About me…

Claim Your Free E-Book Now!

Receive email updates and
my FREE e-cookbook with simple & seasonal recipes.

Let’s Connect

  • Bloglovin
  • Facebook
  • Instagram
  • Pinterest
  • Twitter
  • YouTube

Looking for a recipe?

Recent Posts

  • The Best Strawberry Summer Salad Recipe with Feta
  • Easy Puff Pastry Asparagus Tart with Gruyere Cheese
  • Roasted Balsamic Strawberry Appetizer with Crostini

Recent Comments

  • Jess on Easy Goat Cheese Appetizer with Fig Jam & Pecans
  • Deborah Potts Novgorodoff on Easy Goat Cheese Appetizer with Fig Jam & Pecans
  • Jess on Quick Spring Gnocchi with Asparagus

Archives

Categories

Footer

INSTA-GRATIFICATION

Dill pickle fans, this ULTIMATE DILL PICKLE DIP is Dill pickle fans, this ULTIMATE DILL PICKLE DIP is for you! 

Packed with fresh dill, dill pickles and a crunch pickle and chip topping - this is THE chip dip you need in your life 🤩

Here’s how to make is:

INGREDIENTS:
1 cup softened cream cheese
1/2 cup plain Greek yogurt (or sub sour cream)
1 1/4 tsp garlic powder
1 1/4 tsp onion powder
3/4 tsp salt
Pinch pepper or chili flakes
1/4 cup roughly chopped Dill
1/2 cup chopped Dill pickles
Garnishes: more fresh dill, chopped dill pickles and crushed Plain Ruffles Chips
Plain Ruffles Chips or other plain chip, cracker or veggies for serving!

1. Mix together softened cream cheese, Greek yogurt, garlic powder, onion powder, salt and pepper. Then stir in fresh dill and chopped dill pickles. 
2. Put the dip in a low or regular bowl, top with more fresh dill, chopped dill pickles and a handful of crushed plain Ruffles chips. 
3.  Serve with plain Ruffles chips, another plain chip or crackers or even with veggies!
•
•
•
#dillpickledip #dillpickles #chipsanddip #cookinginmygenes #easyappetizers #appetizerrecipe #appetizerideas #entertainingathome #recipereels #highproteinsnack #diprecipe
This is the BEST STRAWBERRY CHOPPED SUMMER SALAD y This is the BEST STRAWBERRY CHOPPED SUMMER SALAD you’re going to make! It’s bright, fresh and packed with flavourful ingredients like:

*strawberries
*iceberg lettuce
*avocado
*toasted almonds
*basil
*feta cheese
*fennel

It’s the perfect accompaniment to any summer meal OR top it with your fav protein to make it a full dinner. 

Recipe is on the blog, linked in my bio above!

https://www.cookinginmygenes.com/best-strawberry-summer-salad/
•
•
•
 #summersalad #eattherainbow #simplerecipes #easydinner #quicklunch #15minutemeals #saladinspo #cookinginmygenes #strawberries
Save this ONE POT LEMON GARLIC PASTA for a quick a Save this ONE POT LEMON GARLIC PASTA for a quick and easy dinner! Packed with punchy lemon and garlic flavours, this recipe comes together so simply. PLUS you can add your favourite protein to top it if you’d like.

Here’s the recipe friends!

INGREDIENTS:
3 tbsp butter or olive oil
4 cloves garlic, minced or pressed
1 tsp salt
1/4 tsp pepper
1/4 tsp dried oregano
pinch chili flakes
400-450g dried pasta noodles (rigatoni, mezzi rigatoni, penne or ziti)
zest of one lemon
4 1/2 cups vegetable broth
2 tbsp lemon juice
1 cup shredded parmesan cheese
1 tbsp butter
Garnish: shredded parmesan cheese, more lemon zest and fresh basil 

INSTRUCTIONS:
1. Heat butter or olive oil over medium heat. Once warmed, add garlic and cook for 3-4 minutes.
2. Next add salt, pepper, oregano and chili flakes (if using). 
3. Then, stir in pasta and add vegetable broth. Bring to a simmer over medium-high heat and once simmering, turn to medium-low to keep at a simmer. Cook 12-14 minutes, keeping the lid most of the way on the pot. Stir once and a while to make sure the noodles aren’t sticking to the bottom of the pot. 
4. Once noodles are cooked, there should be just a bit of liquid left, covering the bottom of the pot. If you find the noodles need a bit more time, add 1/2 cup more broth at a time and cook a bit longer until done. Stir in lemon juice, parmesan cheese and 1 tbsp butter until fully combined and you have a smooth sauce.
5. Top with shredded parmesan cheese, more lemon zest and fresh basil and enjoy!
•
•
•
#onepotpasta #onepotmeal #cookinginmygenes #quickdinner #recipevideos #easydinnerideas #dinnerrecipes #pastarecipe #vegetarianrecipes
Look no further than this CUCUMBER MINT SANGRIA to Look no further than this CUCUMBER MINT SANGRIA to cheers with on the long weekend!

This recipe along with 5 others is in my FREE PICNIC COOKBOOK that you can download by clicking the link in my bio above. 

Happy weekend friends!

https://www.cookinginmygenes.com/free-picnic-cookbook/
•
•
•
#cocktailsathome #winecocktails #yycfoodblogger#summerdrinks #bhgholiday #cheerstotheweekend #thatfridayfeeling #cookinginmygenes #lightandbright #foodphotographyandstyling #sangria #picnicfood
Sharing my BALSAMIC ROASTED STRAWBERRY DIP as the Sharing my BALSAMIC ROASTED STRAWBERRY DIP as the perfect long-weekend appetizer!

You only need 5 ingredients to make this dip AND the recipe is now on the blog!

Get the link for the recipe in my bio above & enjoy friends!

https://www.cookinginmygenes.com/roasted-balsamic-strawberry-appetizer/
•
•
•
#crostini #cookinginmygenes #easyrecipes #easyappetizers #summerappetizer #strawberryrecipes #boursincheese #appetizerrecipe #entertainingathome #budgetrecipes #cheeseboard #recipereels
This SIMPLE RHUBARB CAKE is perfect for enjoying w This SIMPLE RHUBARB CAKE is perfect for enjoying with family & friends this season!

Make this cake in one bowl and add in all that beautiful rhubarb. Top with brown sugar and cinnamon, bake and enjoy 😍

Recipe is on the blog friends, linked in bio above!

https://www.cookinginmygenes.com/rhubarb-cake/
•
•
•
#rhubarb #rhubarbseason #rhubarbcake #easybaking #cakerecipe #cookinginmygenes #thebakefeed #imsomartha #entertainingathome #inseasonnow #bakingreels
Sharing my favourite cake recipe on Mother’s Day Sharing my favourite cake recipe on Mother’s Day, my Mom’s APPLE CINNAMON CAKE WITH CREAM CHEESE ICING. 

I asked for this cake every year for my birthday and still love it to this day 🎂

Recipe is linked in my bio friends! 

https://www.cookinginmygenes.com/apple-cinnamon-cake-with-cream-cheese-icing/
•
•
•
#birthdaycakeideas #cookinginmygenes  #mothersdaycake #applecake #creamcheesefrosting #thebakefeed #feedfeedbaking #nostalgicrecipes
You need these TWO-BITE PUFF PASTRY CINNAMON ROLLS You need these TWO-BITE PUFF PASTRY CINNAMON ROLLS in your life!

They’re incredibly easy to make for dessert and perfect to add to any brunch get-together too. Here’s how to make them:

Makes 8 mini cinnamon rolls

INGREDIENTS:
1x sheet defrosted frozen puff pastry 
3 tbsp melted butter
1/3 cup packed brown sugar
1 1/2 tsp cinnamon
Egg wash (1 egg with 1 tbsp water)

Icing:
2/3 cup icing sugar
1 tbsp melted butter
1/2 tsp vanilla extract
1 - 1 1/2 milk
pinch salt

INSTRUCTIONS:
1. Pre-heat the oven to 400F and line a baking sheet with puff pastry. 
2. On a piece of parchment paper, roll out the defrosted puff pastry sheet into about 8x12 inch rectangle.
3. Brush the rolled out puff pastry with melted butter.
4. Mix together the brown sugar and cinnamon until combined. Then, sprinkle over the entire puff pastry, using hands or back of spoon to press it gently into the dough. 
5. Start from the long edge side and tightly / gently roll up into a log, trying to tuck in any filling that’s spilling out as you go. Use any leftover melted butter to press and seal the seam so the log doesn’t fall apart.
6. Cut into 1 1/2 inch slices using a serrated knife. Place spiral-side up on the parchment lined baking sheet and brush with egg wash if using.
7. Bake 22-27 minutes until puffy, golden brown and bubbling.
8. Allow to cool for a few minutes on the baking sheet and then move to a baking rack or plate.
9. Make the icing by mixing together the icing sugar, melted butter, 1 tbsp milk, vanilla extract and pinch of salt. If you’d like a bit looser icing, add another 1/2 tbsp milk.
10. Drizzle the icing over the cinnamon rolls and enjoy! Store in an airtight container at room temp for up to 2 days.
•
•
•
#puffpastry #puffpastryrecipes #cookinginmygenes #yycfoodblogger #minidesserts #brunchrecipes #minicinnamonrolls #cinnamonbuns #recipereels #easybaking #entertainingathome
Follow on Instagram

Copyright © 2023 · CookinginmyGenes.com