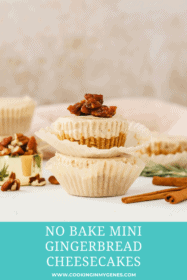
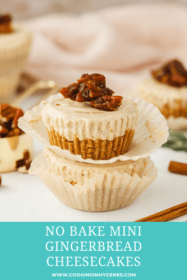
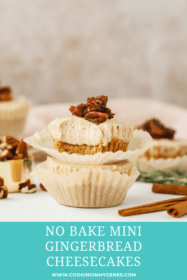
No Bake Gingerbread Mini Cheesecakes
If you’re looking for a holiday dessert, look no further!
These No Bake Gingerbread Mini Cheesecakes hit all the right notes.
Not only are these mini cheesecakes the perfect individual dessert but they are packed with a lot of gingerbread flavour!
I don’t think you will find an easier no bake cheesecake recipe. Sometimes dessert is the last thing we think about when making a holiday dinner. However, I’m a fan of having a small treat at the end of the meal!
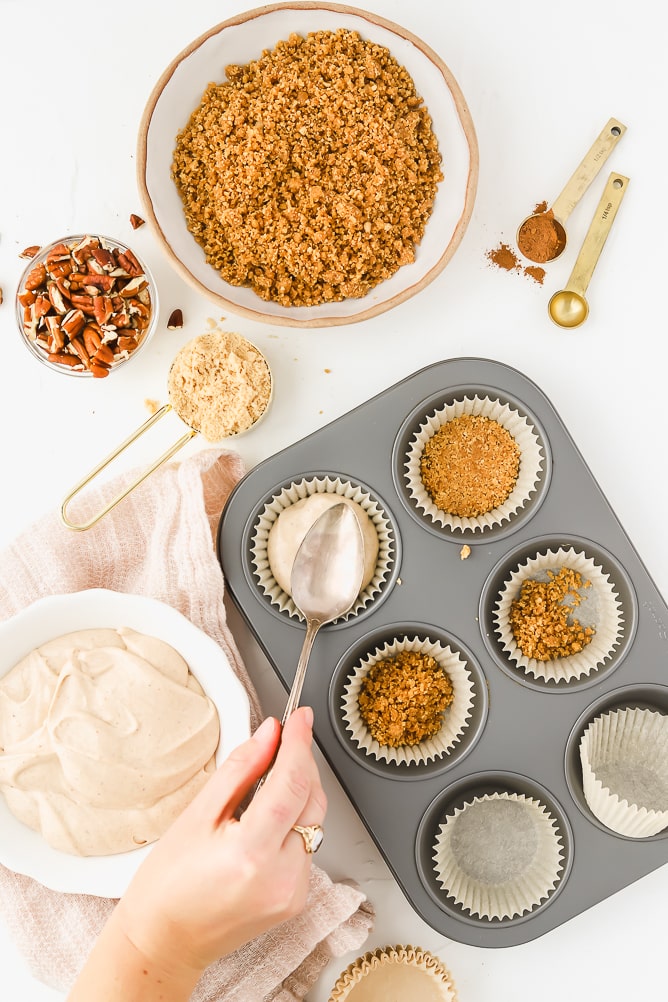
So that’s where these mini gingerbread cheesecakes come in. There are just 3 simple parts to this recipe: crust, filling and topping. The cheesecake filling is best made with a hand or stand mixer, however, a food processor works too.
How to make no bake mini gingerbread cheesecakes
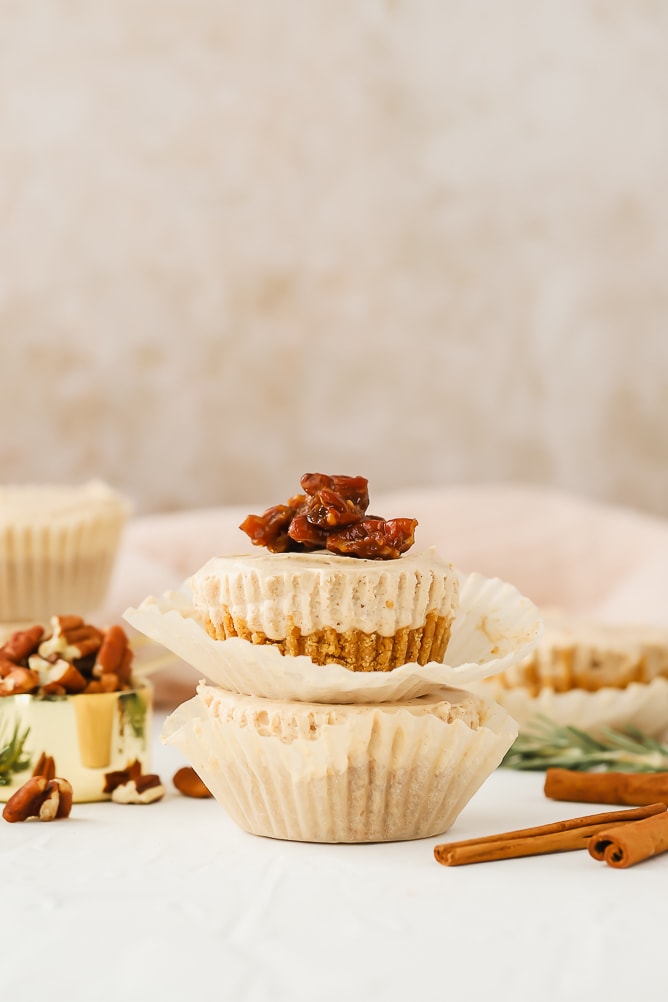
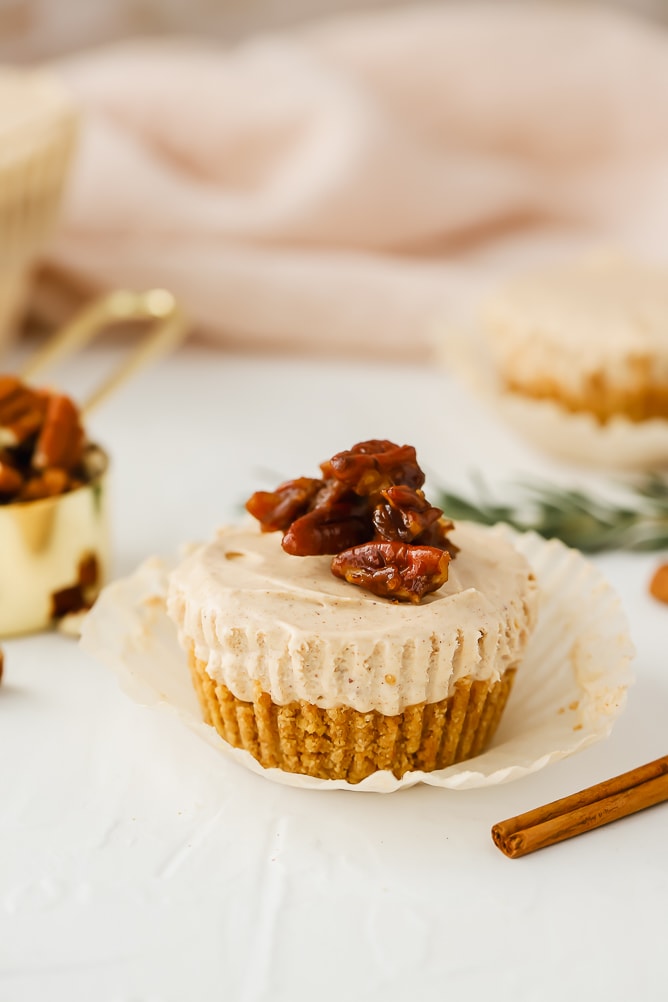
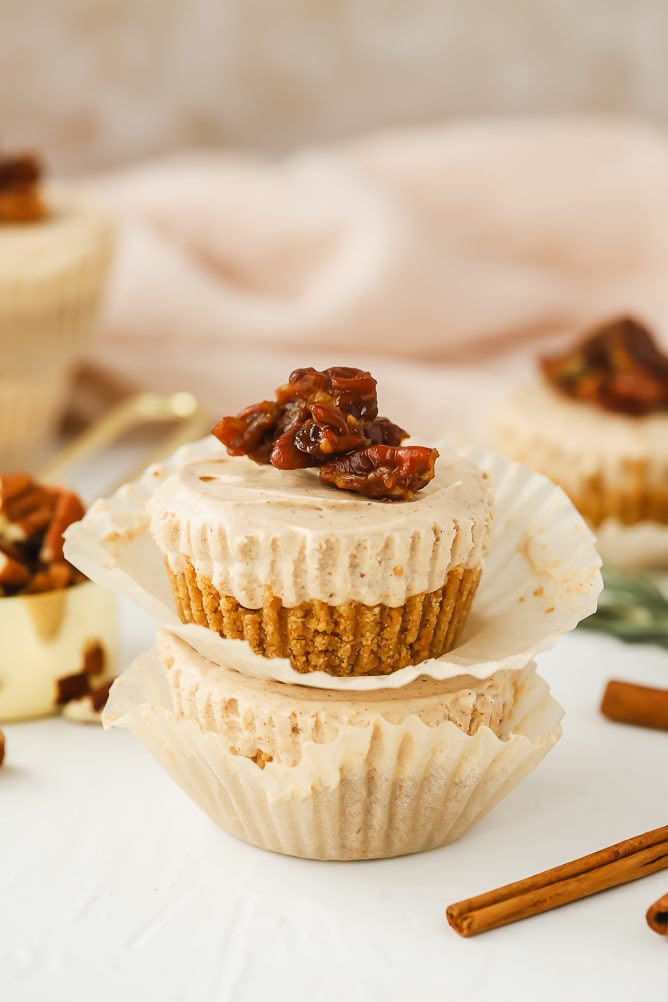
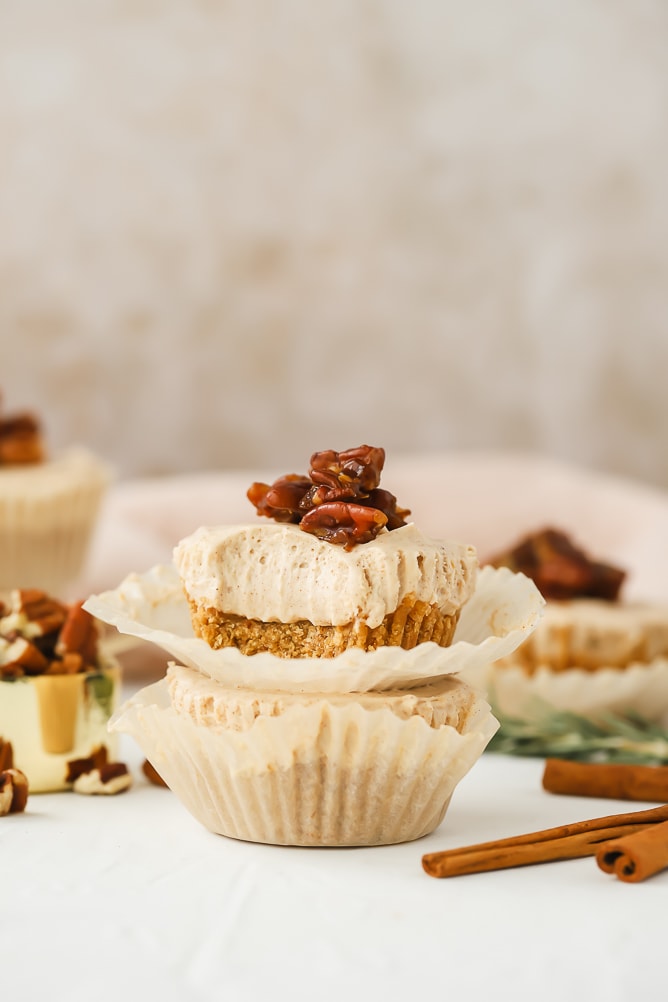
Crust: A mixture of graham cracker crumbs, butter, brown sugar and cinnamon make up a simple crust that is pressed into a muffin tin.
Cheesecake Filling: A mixture of cream cream and sweetened condensed milk starts the filling. Then, we add in spices like ground cinnamon, ground ginger and ground nutmeg for the perfect gingerbread taste. A little vanilla extract is added in along with lemon juice which stabilizes the filling as it’s chilling in the fridge.
Topping: Pecans are coated in melted butter and brown sugar then set to cool for the most divine, crunchy topping.
While the total time for this recipe is a couple of hours (or overnight) depending on how long you let the gingerbread cheesecake chill, they make a great make-ahead dessert!

No Bake Gingerbread Mini Cheesecakes
Equipment
- regular-sized muffin tin
Ingredients
Crust
- 1 cup graham cracker crumbs
- 1/4 cup butter
- 2 tbsp brown sugar
- 1/4 tsp cinnamon
Cheesecake Filling
- 1 250g package of cream cheese, softened
- 1/2 cup sweetened condensed milk
- 1/4 cup brown sugar
- 1 1/4 tsp ground cinnamon
- 1/2 tsp ground ginger
- 1/2 tsp ground nutmeg
- 1/2 tsp vanilla extract
- 2 1/2 tsp lemon juice
Candied Pecans Topping
- 1/2 cup chopped pecans
- 1 tbsp butter
- 3 tbsp brown sugar
Instructions
Crust
- In a small bowl mix together melted butter, graham cracker crumbs, cinnamon and brown sugar until combined.
- Line a regular-sized muffin tin with 9 cupcake holders. Then, divide the crust mixture evenly between the 9 muffin cups, using about 2 tbsp crust mixture in each. Press down using the back of a spoon or measuring cup to form an even crust. Refrigerate for 30 mins.
Cheesecake Filling
- While the crust is in the fridge, make the filling. In a large bowl whip together (using a hand or stand mixer) the softened cream cheese, sweetened condensed milk, brown sugar, ground cinnamon, ground ginger, ground nutmeg, vanilla extract and lemon juice until well combined and fluffy.
- When the crusts are done chilling, divide the filling evenly between muffin cups, about 2 heaping tablespoonful in each and use the back of a spoon to gently press down and smooth the tops of each cheesecake. Chill in the fridge for 4 hours or overnight.
Candied Pecans Topping
- In a pan melt butter over medium heat, add in pecans and stir.
- Cook medium-low heat for about 3-4 mins until pecans are lightly toasted. Add in the brown sugar and stir to melt. Once combined, remove from the heat and transfer to a plate or pan lined with parchment paper until cooled. Then, break apart as the topping for each mini cheesecake.
- Store mini cheesecakes in the fridge in a covered container for up to 3 days. Take out 10-15 minutes before enjoying.
Notes

What’s the difference between a baked and no-bake cheesecake?

The main difference between these no-bake mini cheesecakes and a baked cheesecake is the no-bake cheesecake ‘sets’ by chilling in the fridge. There is no baking required whereas a baked cheesecake is baked and then chilled.
If you’re a fan of no-bake desserts, this cheesecake recipe is for you!
Every bite you take is the perfect hit of that gingersnap-gingerbread flavour that we love this time of year.
And, if you like mini cheesecakes as much as I do, try my No-Bake Mini Cranberry Cheesecakes too!
Until the next cooking adventure,
Jess
")


")

I also doubled the recipe and they haven’t set. so many other cheesecake recipes use whipped cream to give it lift and I wonder if that’s what is missing. I have them in the freezer now but reading the other person’s comment I think it may be a lost cause 🙁
I’m sorry to hear this! I have tested the recipe again (not doubled) and they did set so it’s possible this recipe just does not work when the batch is doubled. Thank you for the feedback, I’ll look to improve this one!
I doubled the recipe and it tasted wonderful, but the cheesecake never set up. It was in the fridge overnight and I even put it in the freezer for a couple of hours. It was more like runny pudding. I must have done something wrong.
Thanks for the feedback! Sometimes when recipes are doubled it can affect the setting time. I will test this recipe again to ensure everything works! Hope you can find some other great recipes on the blog 🙂
Was wonder if they could be made ahead of time and frozen?
I have not tested freezing these so I can’t comment on how the texture will be after they’re frozen; you might expect the texture to be a bit different. However, common advice is you can freeze no bake cheesecake for up to 2 months and defrost in the fridge (do not defrost at room temperature). I hope that helps!
How much vanilla extract?? The instructions mention it but it is not mentioned in the ingredients
Hi there! I’m sorry I don’t see vanilla extact listed in the instructions.
When describing making the cheesecake filling you mention adding a little vanilla extract, but you don’t have that listed in the ingredients.
Ahh I see it now! It’s in the description in the body of the blog post and I completely forgot it in the recipe. I’ve now updated the recipe – there should be 1/2 tsp in the filling. Thank you!