It’s peak soup season, so if you’re looking for a creamy and rich soup, look no further than this roasted cauliflower soup!
This creamy cauliflower soup takes less than 1 hour to make.
It is so smooth and velvety you’ll never believe it doesn’t have cream in it.
We’re nearing the end of winter, but I’m still in full blown soup mode! Right now all I want is a filling and nourishing soup, so I’m either going to be making this roasted cauliflower soup or my healthyish broccoli cheddar soup!
Why you’ll love this roasted cauliflower soup!
You can store this cauliflower soup in the fridge for 3 days, so I love making it on a Friday and having it for lunch on the weekend.
This vegetarian soup gets a protein boost from white beans! The white beans also make this soup creamy and rich, no cream or flour needed.
You need simple ingredients that you probably already have in your pantry.
By roasting the cauliflower and garlic before adding to the soup you’ll get so much more flavor!
This isn’t just a vegetarian soup – it’s also vegan! So perfect for those with food allergies.
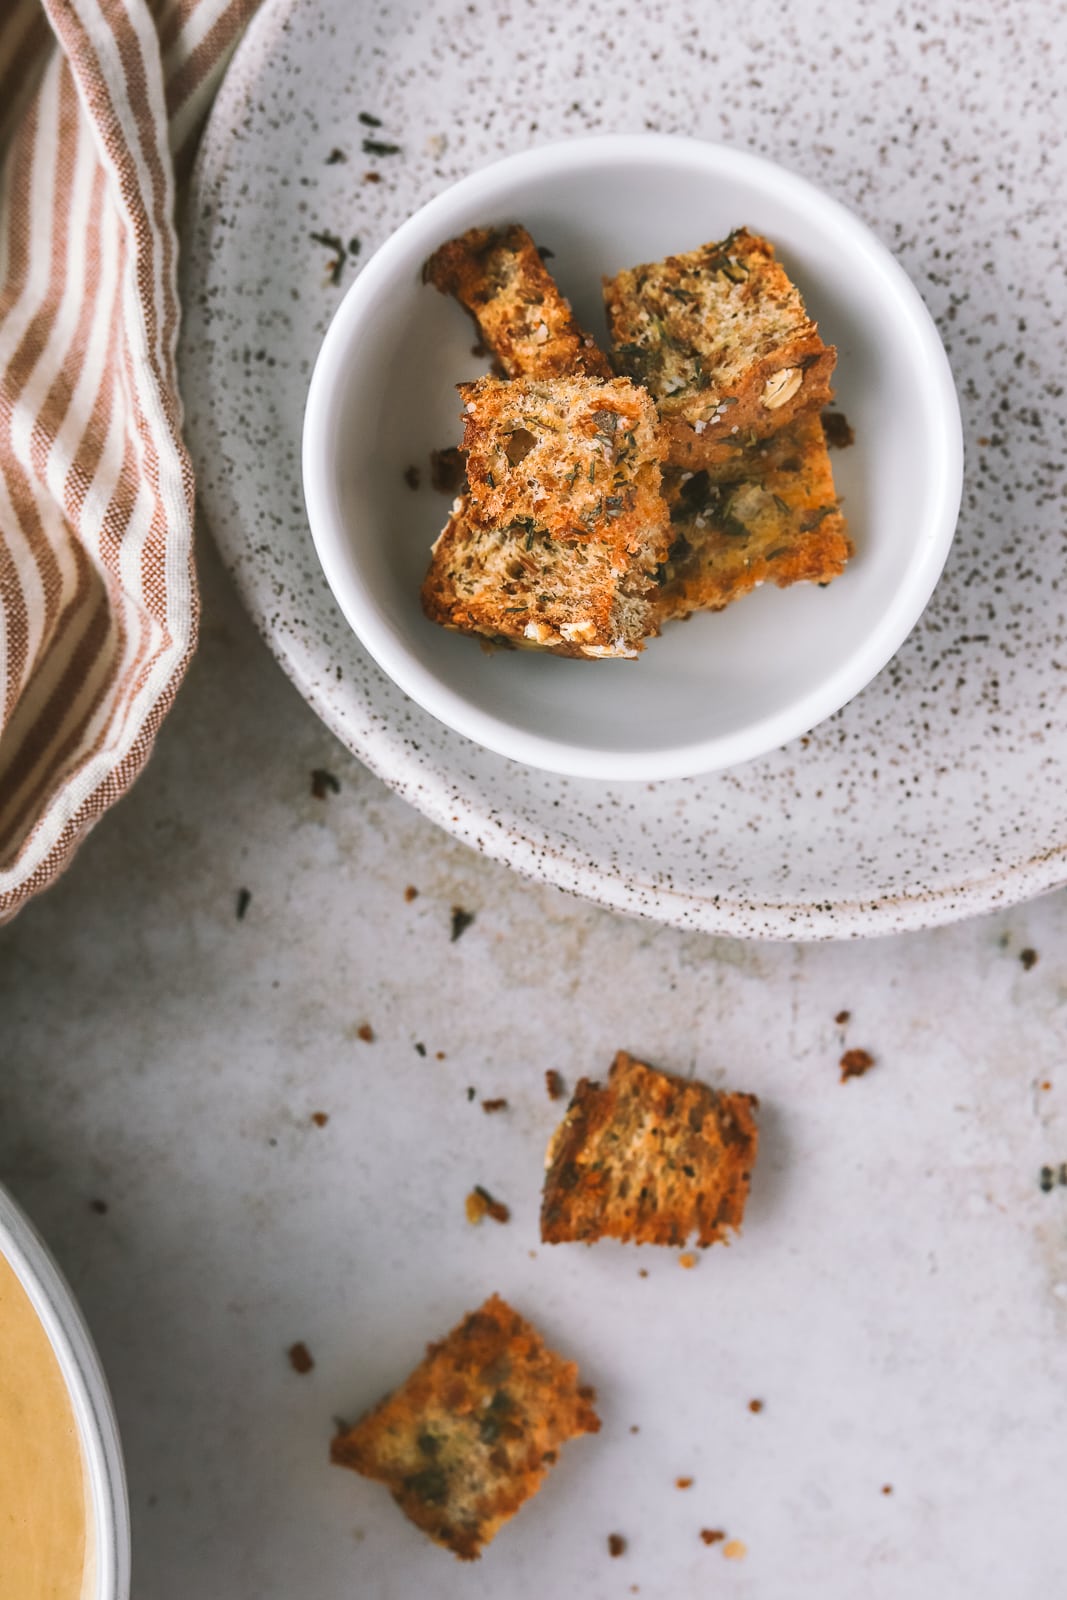
And to top this soup off, the thyme-croutons are sure to please, adding the perfect savoury topping.
Ingredients Needed for this delicious soup
Cauliflower: Cauliflower is packed full of nutrients and roasting it will give you so much flavor!
Garlic: Make sure to leave the skin on as we want to roast the garlic cloves whole.
Onion: A classic base flavour for making soup.
Vegetable Stock: The liquid needed to bring this soup together.
White Beans: This will give you a plant-protein boost plus it’ll make the soup extra creamy without having to actually use cream! You can use navy beans or cannellini beans.
Spices: To give the soup a touch more flavor use spices like cumin and paprika and fresh thyme.
Bread: This is totally optional but I love making homemade croutons to top my cauliflower soup.
Step by step process for making this creamy cauliflower soup
Step 1: Pre-heat your oven to 450F. Mix your cauliflower florets with the olive oil, salt, pepper, cumin and paprika and then spread out onto a baking sheet. Then add your three garlic cloves, still in their peels onto the baking sheet.
Step 2: Bake the cauliflower in the oven for 15 minutes, take out and flip the cauliflower, then put back in the oven for 10 more minutes.
Step 3: While the cauliflower is roasting, turn your large pot to medium heat and add in 2 tbsp olive oil. Then add in your chopped onions, sautéing until translucent, about 5-7 minutes.
Step 4: Add in your beans, broth, sprigs of thyme and a pinch of salt and pepper and bring to a simmer. Once simmering, set to low and let simmer 8 more minutes. Then turn the heat off until your cauliflower is done roasting.
Step 5: Once the cauliflower is done roasting, remove the thyme sprigs from the pot. Then, add the cauliflower to the pot and squeeze the roasted garlic out of their shells into the pot.
Step 6: Using a hand-blender, blend until your desired consistency in the pot (or if you’re using a regular blender, blend in batches and then return all of the soup to the pot).
Step 7: Heat the soup over low heat for about 5 minutes and then taste, adjusting seasoning further to your liking.
Step 8: Once your soup is finished you can make the croutons. Pre-heat your oven to 400F and slice your multigrain bread into small squares to measure 2 cups of bread. In a bowl mix the bread with 1 tbsp olive oil, 1 tbsp fresh thyme and pinches of salt and pepper. Spread out the bread on a baking sheet and bake for 10 minutes.
Step 9: Then top your delicious soup with your savoury croutons for a wonderfully cozy meal!
Pre-heat your oven to 450F. Mix the cauliflower florets with 2 tbsp olive oil, salt, pepper, cumin and paprika and then spread out onto a baking sheet. Then add in the garlic cloves, still in their peels onto the baking sheet.
Bake the cauliflower in the oven for 15 minutes, take out and flip the cauliflower, then put back in the oven for 10 more minutes until tender and starting to turn golden / caramelized.
While the cauliflower is roasting, turn your large pot to medium heat and add in 2 tbsp olive oil. Then add in your chopped onions, sautéing until translucent, about 5-7 minutes.
Add in the beans, broth, sprigs of thyme and a pinch of salt and pepper and bring to a simmer. Once simmering, set to low and let simmer for 8 more minutes. Then turn the heat off until your cauliflower is done roasting.
Once the cauliflower is done roasting, remove the thyme sprigs from the pot. Then, add the cauliflower to the pot and squeeze the roasted garlic out of their shells into the pot.
Using a hand-blender, blend until your desired consistency in the pot (or if you’re using a regular blender, blend in batches and then return all of the soup to the pot).
Heat the soup over low heat for about 5 minutes and then taste, adjusting seasoning further to your liking with more salt and pepper.
Once your soup is finished you can make the croutons. Pre-heat your oven to 400F and slice your multigrain bread into small squares to measure 2 cups of bread. In a bowl mix the bread cubes with 1 tbsp olive oil, 1 tsp dried thyme and pinches of salt and pepper. Spread out the bread on a baking sheet and bake for 8-10 minutes or until turning golden.
Then top your delicious soup with the homemade croutons for a wonderfully cozy meal! Alternatively you can just serve with your favourite toasted bread.
Notes
Store in the fridge for up to 3 days.
A quick note when you go to reheat the soup, since it's a thicker soup, add a splash of broth or water and then reheat on medium-low.
If you like soup with more texture, puree a little less to your desired consistency.
For an extra creamy flavour, stir in ½ cup shredded old / sharp cheddar cheese.
Do I have to roast the cauliflower?
Roasting the cauliflower before adding it to the soup will make the cauliflower extra tender and a caramelized flavor which will make all the difference
Why is my cauliflower soup bland?
It’s all in the tasting! Make sure to taste your soup and adjust the seasonings before you finish making it.
Is this soup vegan?
Yes! This roasted cauliflower soup is vegan and vegetarian as long as you use vegetable stock and don’t add the optional cheese.
Expert Tips
If you really want to kick up the creaminess, add ½ cup of shredded sharp cheddar cheese!
When reheating the soup, I recommend adding a splash of broth or water and then heating on medium-low. You’ll need to add some extra liquid as it’s a thick soup!
If you prefer a chunkier soup, don’t blend it until completely smooth. You can save some of the cauliflower florets and add them after blending the rest of the soup.
Feel free to top the soup with different herbs like green onion, chives or fresh thyme!
I recommend getting cozy and making this soup on a cool evening when you’re in the mood for something soothing.
What a gorgeous post! I love cauliflower soup. It reminds me of my late grandma, so it’s super nostalgic and all kinds of special. I think I need to make this soon 🙂 I love your photos!
Thanks for the love Dana! I love when recipes elicit a nostalgic response, recipes can take you right back to those special times with family and friends – I have so many food-related memories too 🙂 I hope you enjoy the soup recipe when you make it!
Yum! That’s exactly my kind of soup recipe. I love soups in the winter! MMmmm! and roasting vegetables ahead of time always makes soups so good! Well done!
I love roasted cauliflower too Cathy! I hope you enjoy the recipe when you try it – the roasted cauliflower gives the soup a ton of flavour! Thanks for stopping by 🙂


")
")

")


Great pictures and the soup looks great!
Thanks for the photo & recipe love Joyce!
I’m on a big cauliflower soup kick so I’m excited to give this new variation a try!
I’m totally on a cauliflower kick right now too! I’d love to hear about your experience making this recipe too – thanks for coming by the blog!
What a gorgeous post! I love cauliflower soup. It reminds me of my late grandma, so it’s super nostalgic and all kinds of special. I think I need to make this soon 🙂 I love your photos!
Thanks for the love Dana! I love when recipes elicit a nostalgic response, recipes can take you right back to those special times with family and friends – I have so many food-related memories too 🙂 I hope you enjoy the soup recipe when you make it!
Yum! That’s exactly my kind of soup recipe. I love soups in the winter! MMmmm! and roasting vegetables ahead of time always makes soups so good! Well done!
So glad to hear this is your kind of soup! I love soups in the winter too, I think I make at least one a week! Thanks for the recipe love 🙂
I love the ideas of roasting the cauliflower for soup and using beans rather than dairy to make it creamy. I’m going to try this!
I love roasted cauliflower too Cathy! I hope you enjoy the recipe when you try it – the roasted cauliflower gives the soup a ton of flavour! Thanks for stopping by 🙂
This looks delicious! I’m for sure going to try it.
Thanks for the recipe love Christy! Let me know how you like the recipe when you try it out – thanks for coming by the blog!